ADVENTURES OF A LIFETIME
Conservation Treatment of the Broome Album
Introduction
Amongst the papers in our John Egerton ‘Jackie’ Broome collection is a photograph album belonging to his father Louis Egerton Broome (1875 – 1951). Dating from the turn of the 20th century, the album documents his adventures and work as a gold prospector in Alaska, an engineer involved in the construction of the Panama Canal, the Camacho Reservoir in California, and the development of the railway network in China.

Being such an interesting documentation of life surrounding major engineering projects at the time (including the devastation caused by a ‘tidal’ wave) the album has been heavily used and enjoyed by successive generations of the Broome family. This, combined with poor quality construction materials, meant that the album has suffered from quite a bit of damage and was unable to be issued to researchers.


Description and Condition of the Album
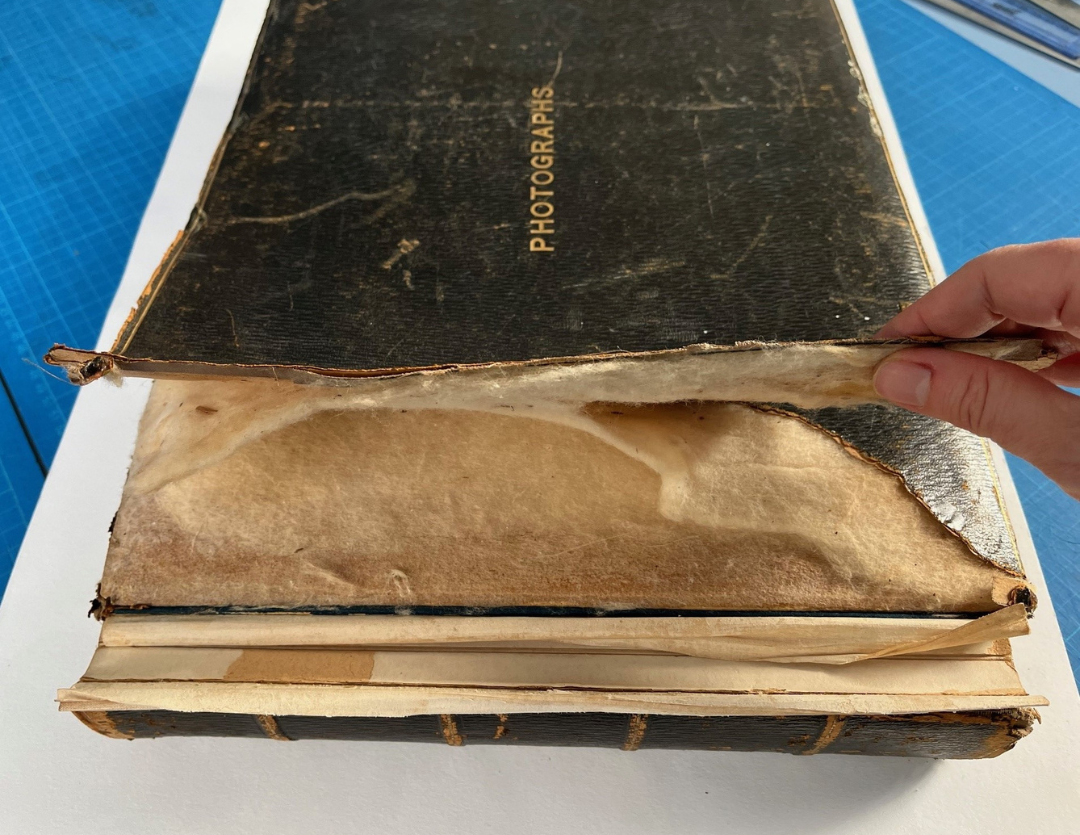
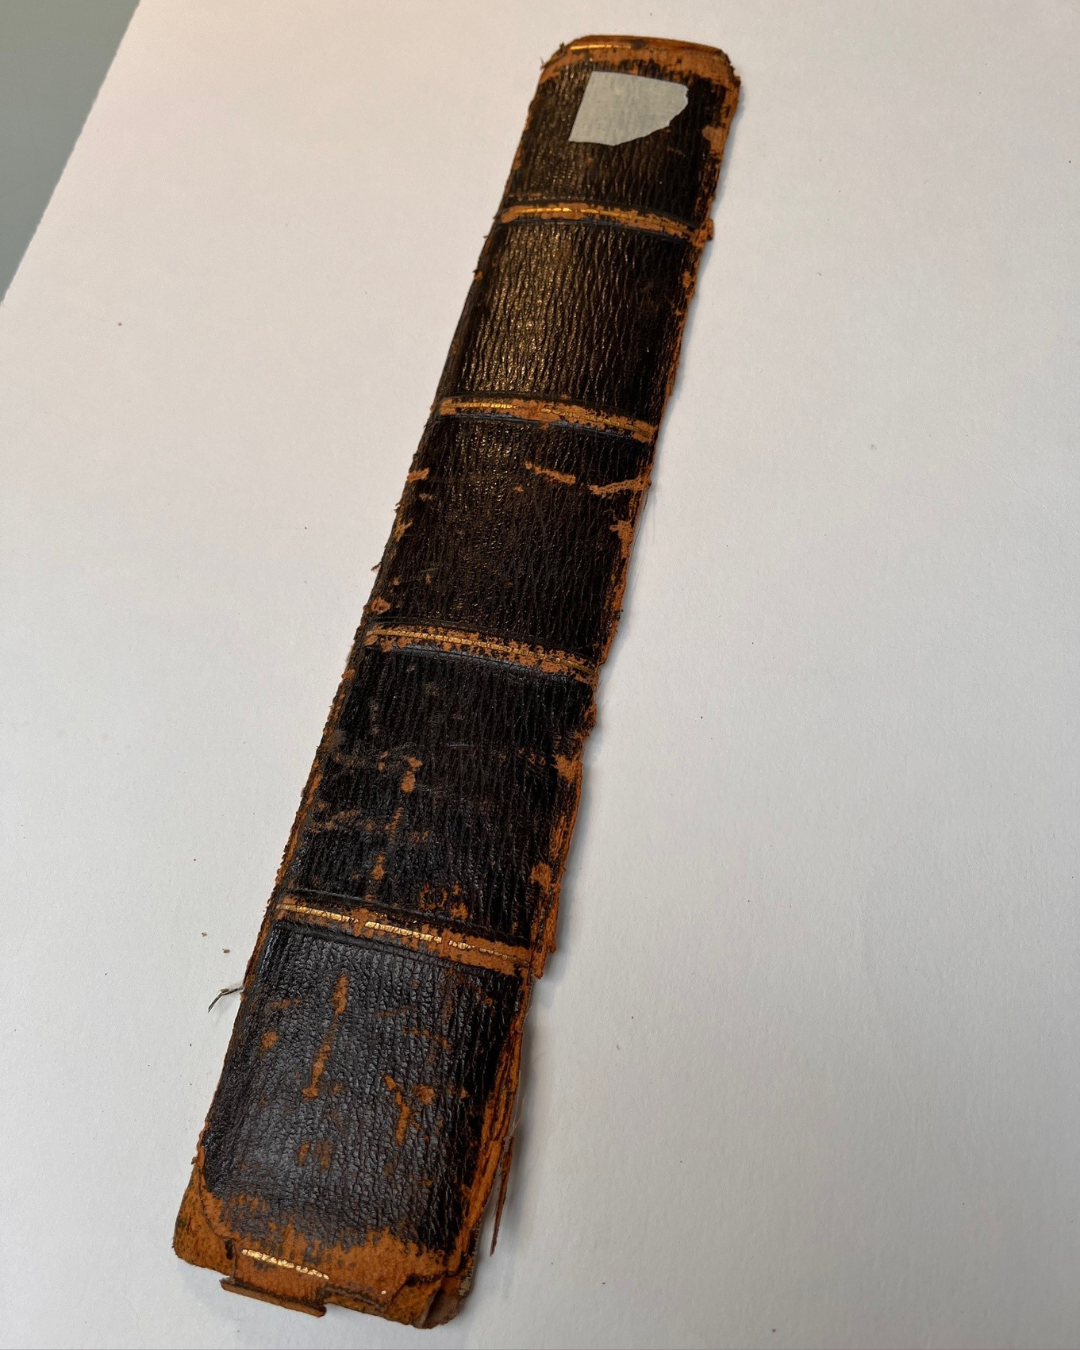
The album was covered in brown calf leather that has become weakened and damaged – notably along the joints causing the front board to become detached along with the flyleaf. The leather was also split along many of the board edges resulting in the board coverings lifting and exposing the cotton wadding underneath. The large dent in the foredge is evidence of an unfortunate accident!
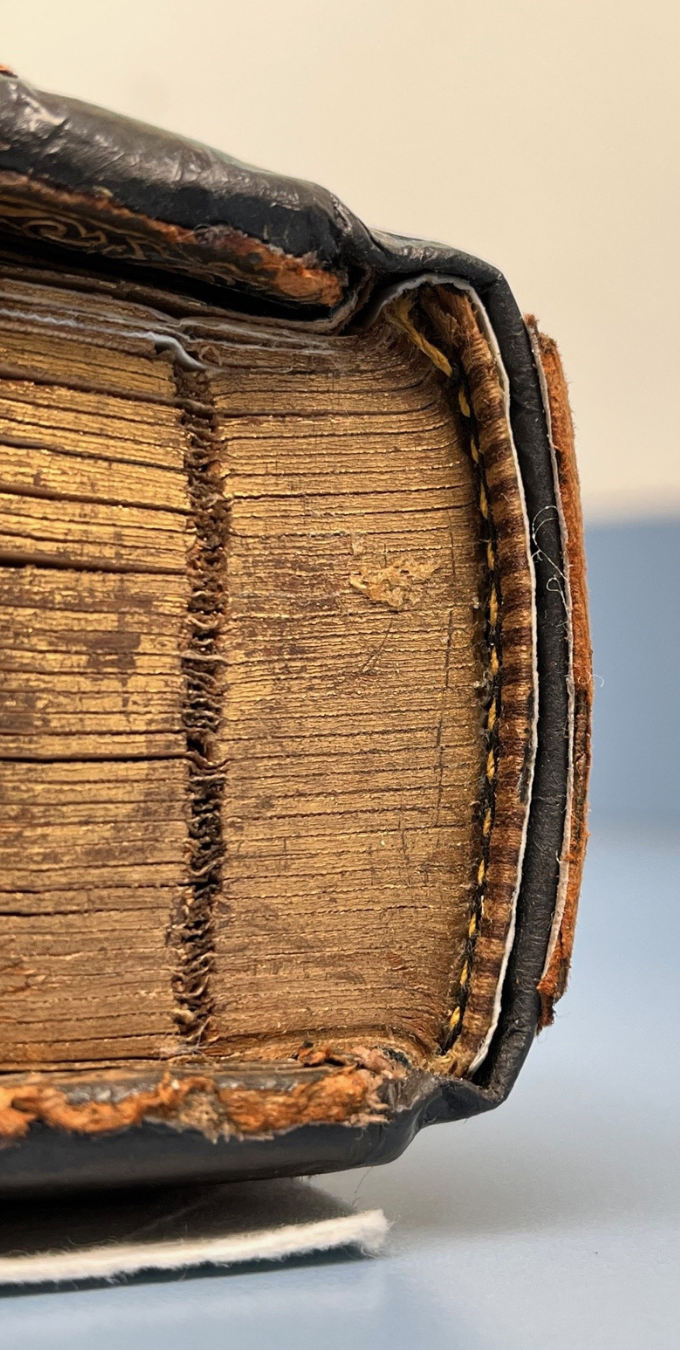
To allow the pages to flex and open more readily each page incorporates a guard covered with a strip of cloth. These are attached to the neighbouring page holding the book together instead of a sturdier sewing technique. Additional support is provided on the spine by a layer of animal glue and a lining of brown paper and mull. The spine also includes a hollow, a technique designed to limit flexing of the leather spine and to allow the book to open flatter.
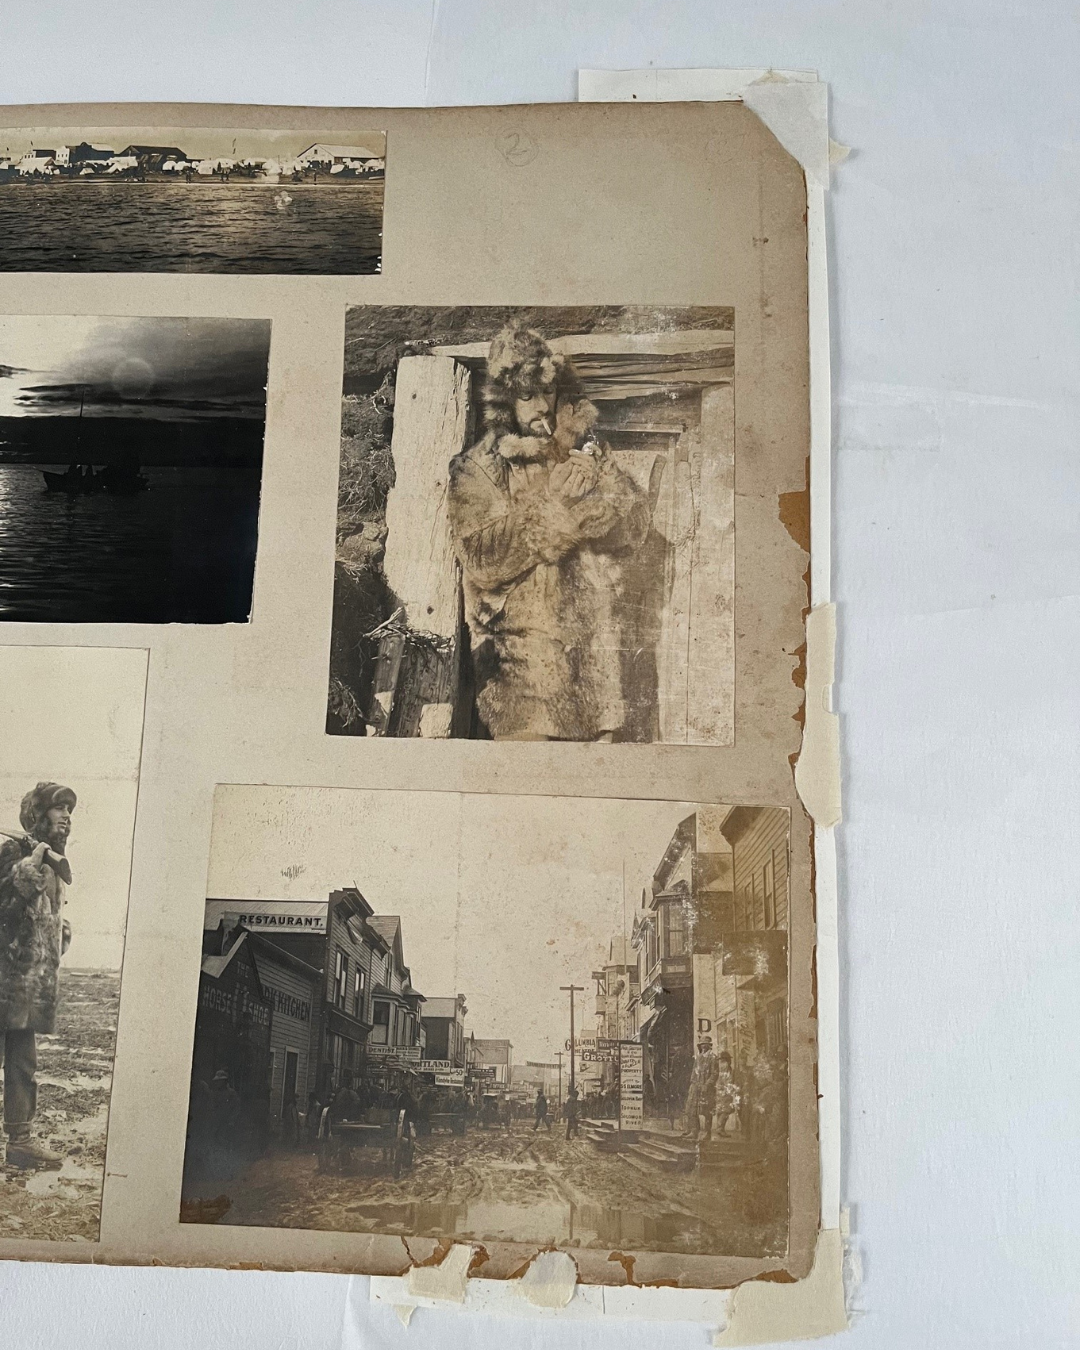
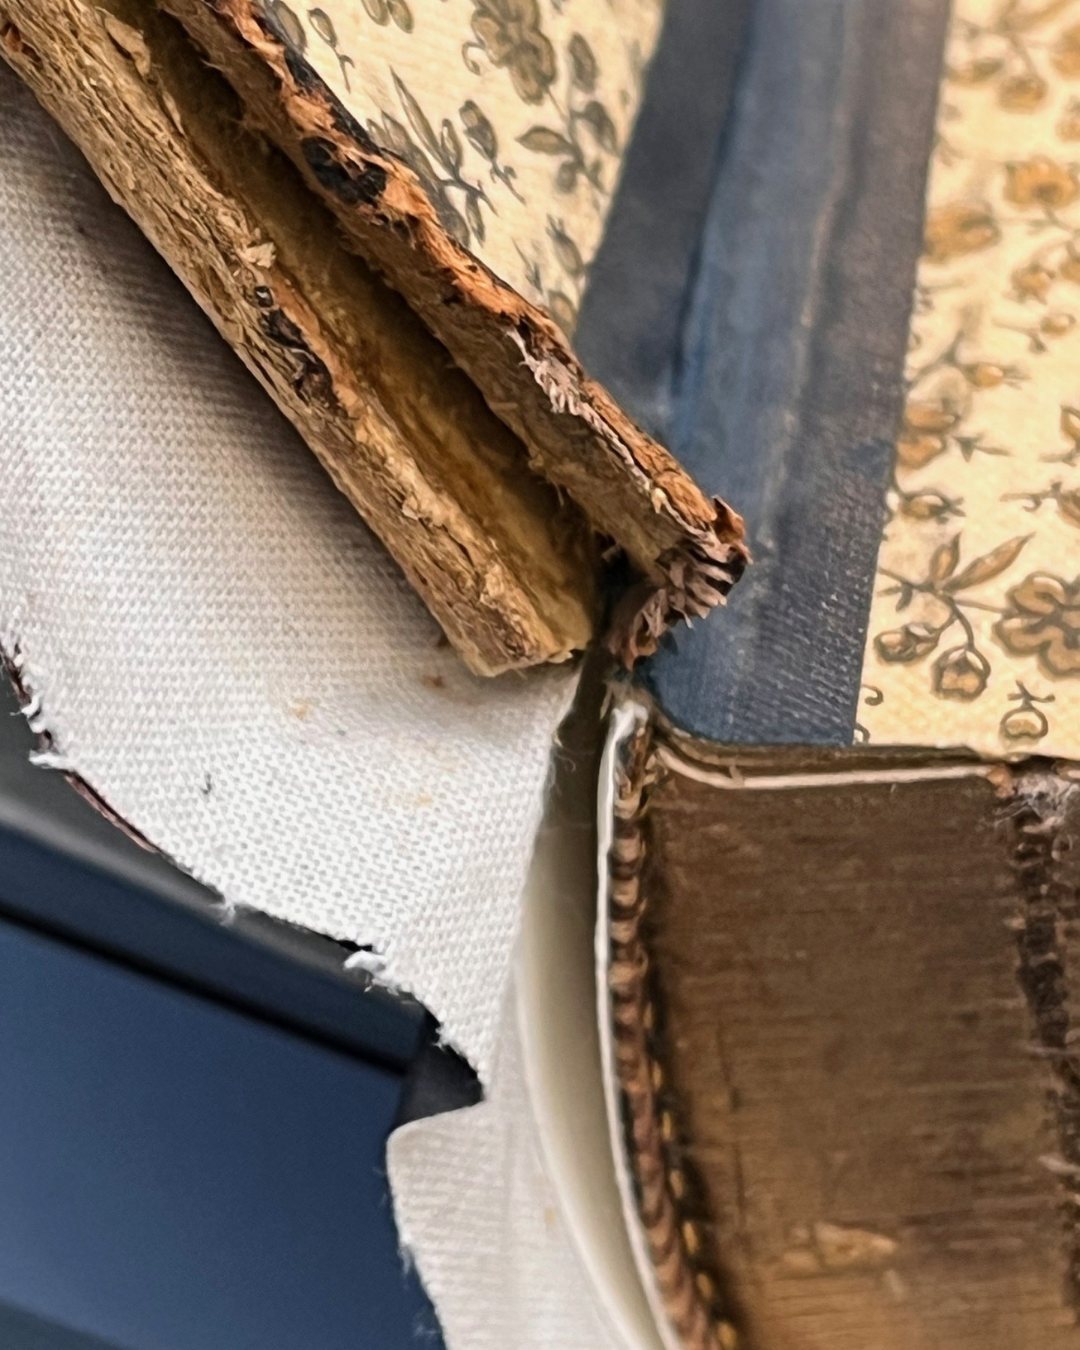
Over time, the poor-quality card used to form the pages has degraded rendering them very brittle. Through handling the page edges are starting to crumble with some losses, especially at the fore-edges and corners.
The photographs are mostly gelatin . As a result of the acidic components of the pages, and likely previous exposure to harmful environments (e.g. atmospheric pollution), some of the photographic images are starting to fade, particularly those adjacent to the more exposed edges.
Treatment
Conservation treatment endeavours to maintain the integrity of the item, whilst preserving as much of the original material as possible. We also aim to make the object functional and to minimise any potential future deterioration.
The following sections document the different stages of treatment and shows the techniques and materials used to repair the album.
Dry Cleaning
Surface dry cleaning removes abrasive, oily and acidic dirt. As the surface layers of photographs tend to be vulnerable only soft brushes were used on these, whereas plastic erasers and smoke sponges can be used on the surrounding areas of the pages.

Repairing Damaged pages
To strengthen the weak pages a layer of heavy weight archival paper was inserted into the de-laminated page fore-edge and adhered using wheat starch paste. Missing areas were built up using toned Japanese paper and later trimmed in line with the original edges. Loose pages were re-adhered into place using the original cloth hinges and Japanese paper.


Repairing the Large Tear in the Leather
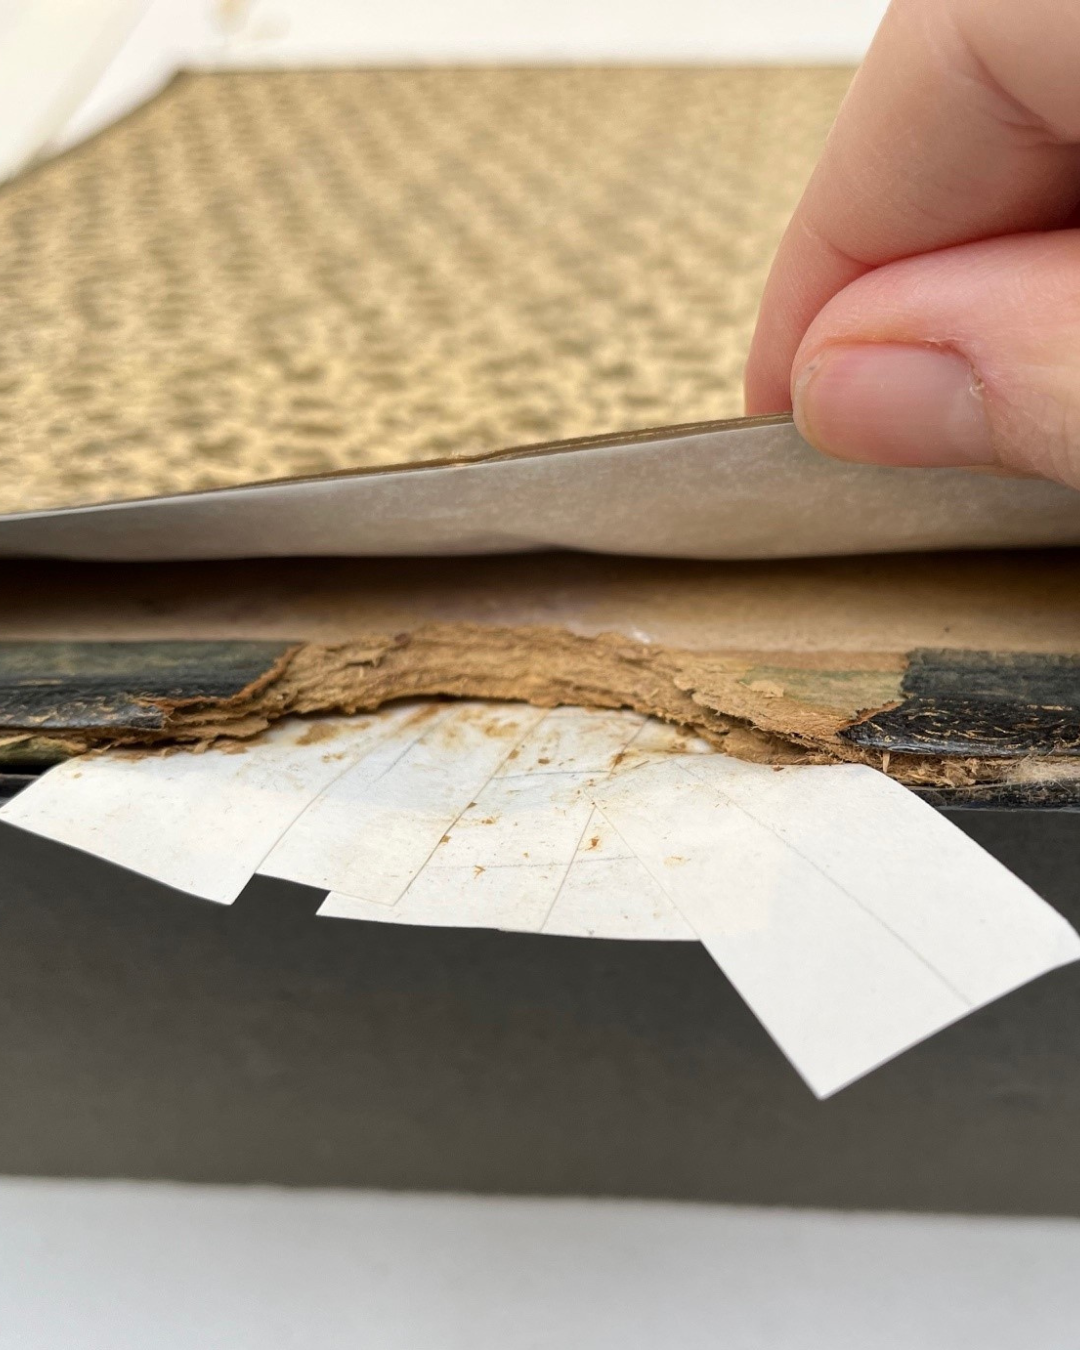
To repair the large split in the board leather, a strip of Japanese paper was initially applied to the underside of the lower split using wheat starch paste. Once dried the upper edge could also be adhered to the strip. It was important to keep the original cotton wadding in place.


Repairing the Dent in the Board
The best method of repairing a large missing area was to use paper pulp. This was pre-prepared using shredded pieces of Japanese paper. The pulp had to be applied to a supporting layer, this was provided by strips of heavy weight paper inserted between layers of the original board. Once the repair had completely dried it could be sanded and covered with a layer of Japanese paper dyed with acrylic paint to match the original leather.


Repair of Board Corners
The worn corners exposed the layers of board that were delaminating weakening them further. By inserting some layers of acid-free paper and applying wheat starch paste the corners could be consolidated. A layer of toned Japanese paper strengthened the corner further and allowed it to blend in.

Repair of Board Edges
The splits in the leather on the board edges were treated in a similar way. Firstly, the leather needed to be lifted away from the boards. After the edges were consolidated using wheat starch paste a layer of toned Japanese paper could be pasted, inserted and allowed to dry. The original leather could be lighted pasted and reshaped over this repair.
Relining of Spine and Re-attachment of Headbands
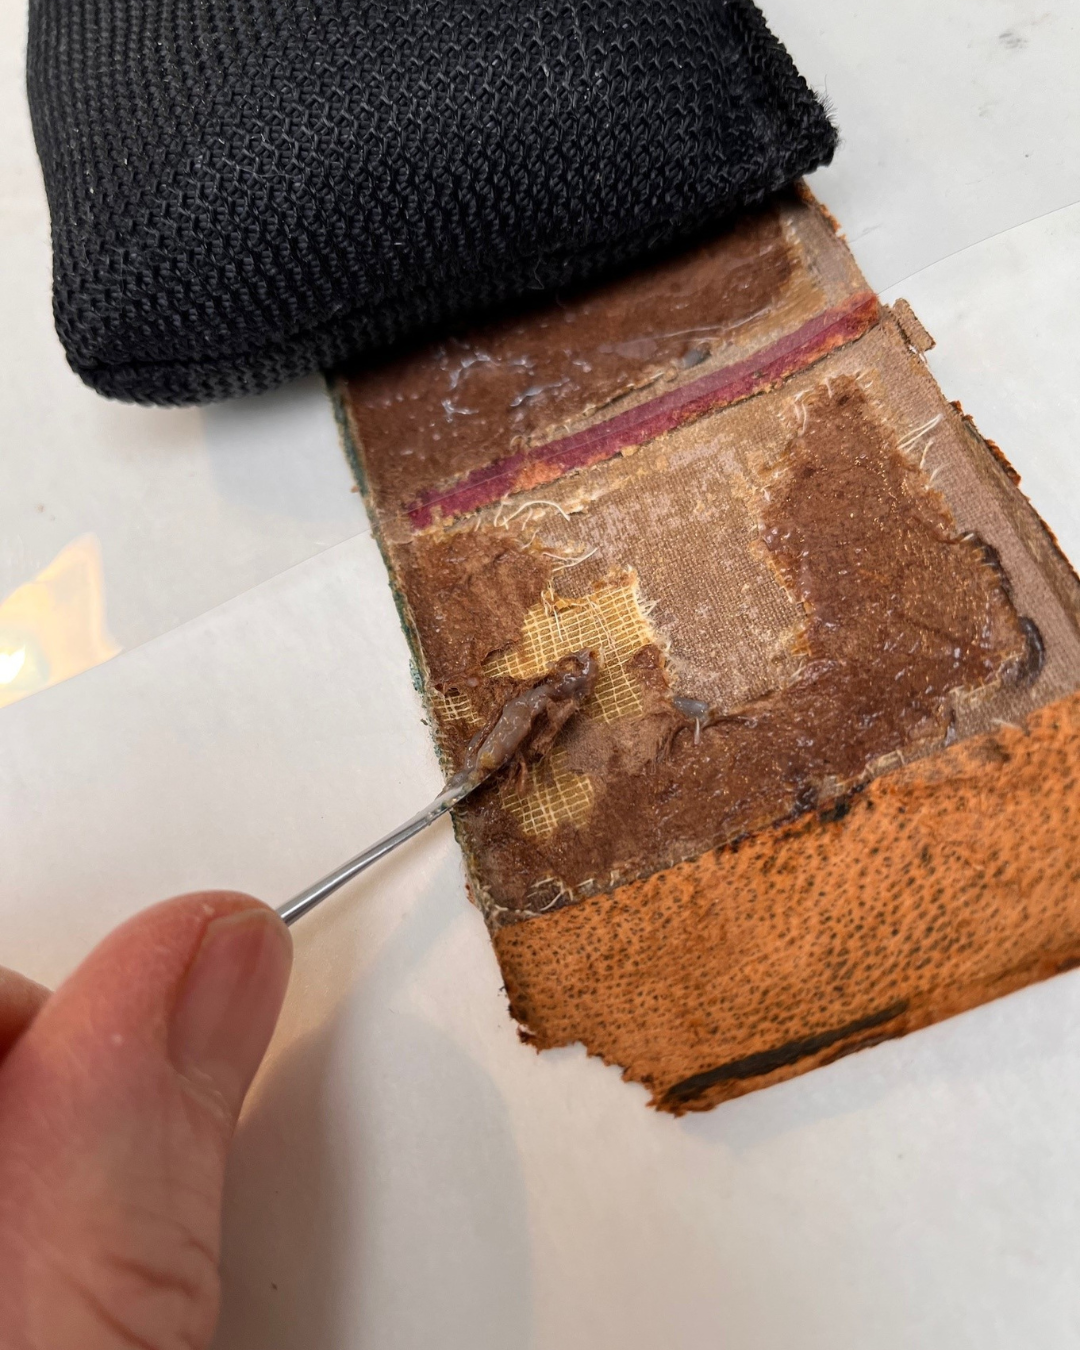
With the boards repaired the focus turned to the main book block to prepare it for re-assembling. Because the boards would be re-attached using an extension of a new spine covering, the original leather spine was temporarily removed to prepare the back of the book block. An application of thick wheat starch paste acted as a poultice to soften the paper linings and animal glue to easily enable their removal. The original headbands were also removed at this stage. A new lining of heavy weight Japanese paper was applied to the back of the book, followed by the original headbands, and finally a new hollow constructed from thin archival card. This, not only acted as a support for the new spine covering, but also helped to consolidate and hold the album page sections together.


Preparation of New Spine Lining and Attachment to Front Board
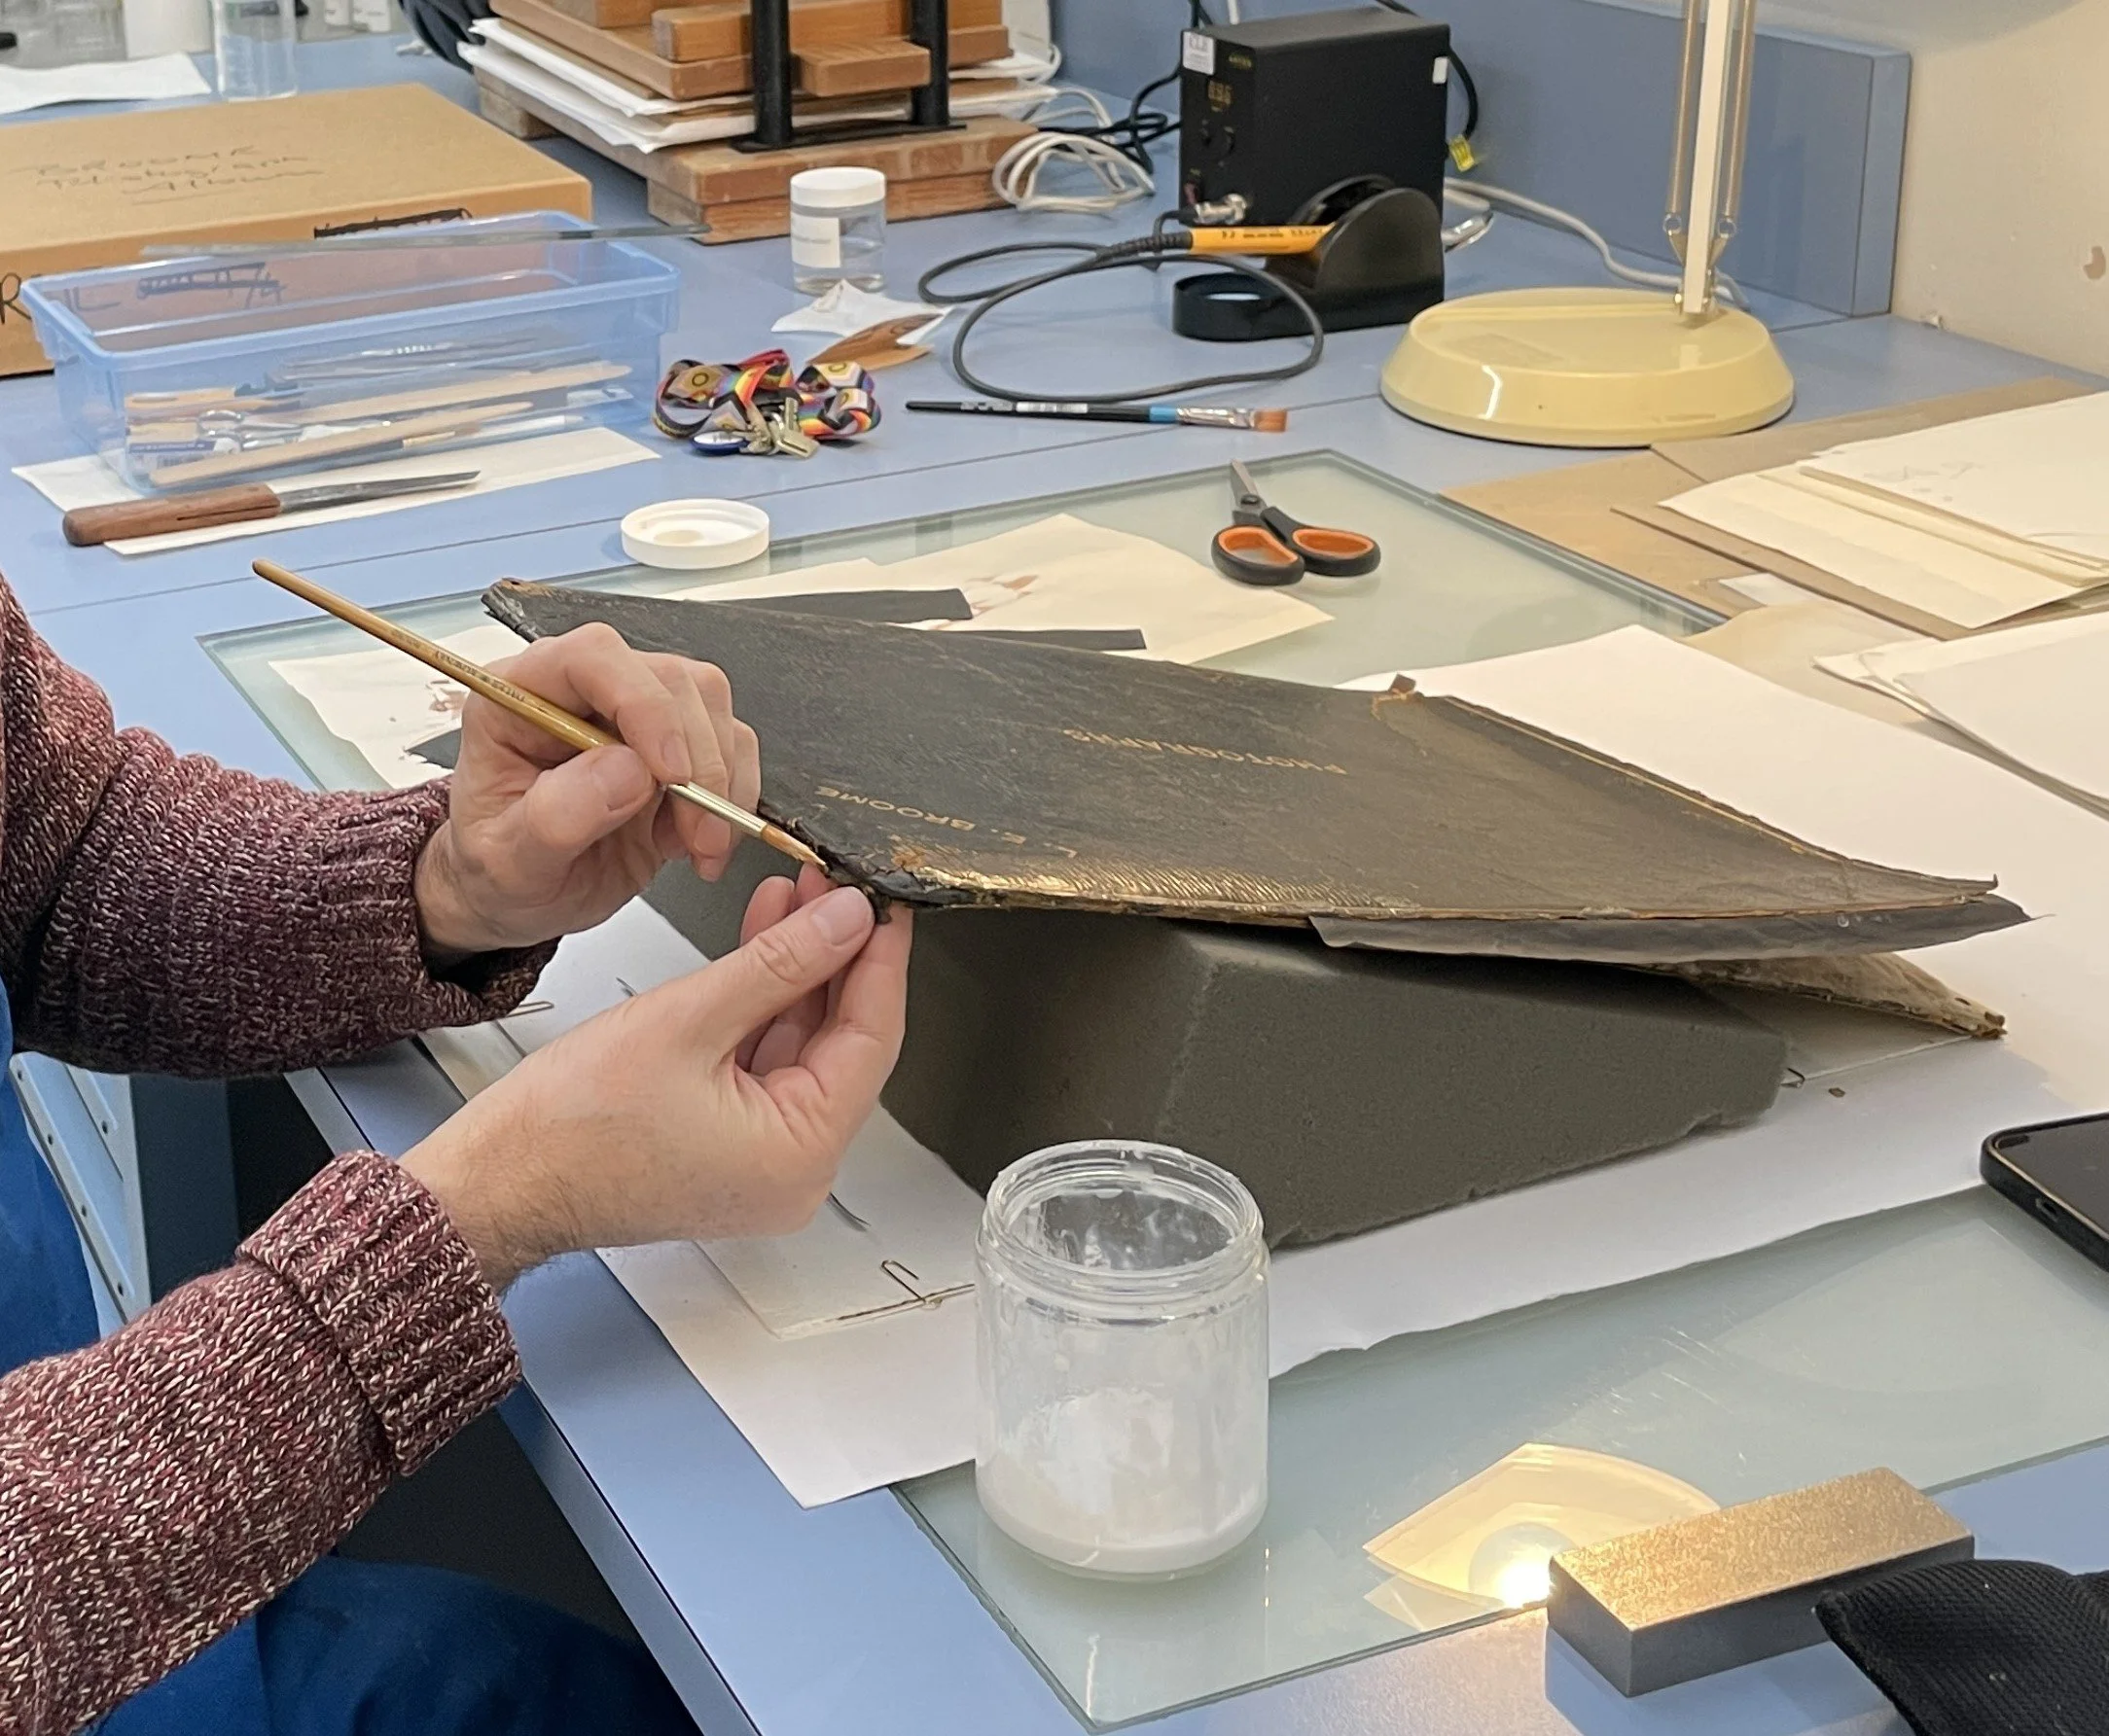
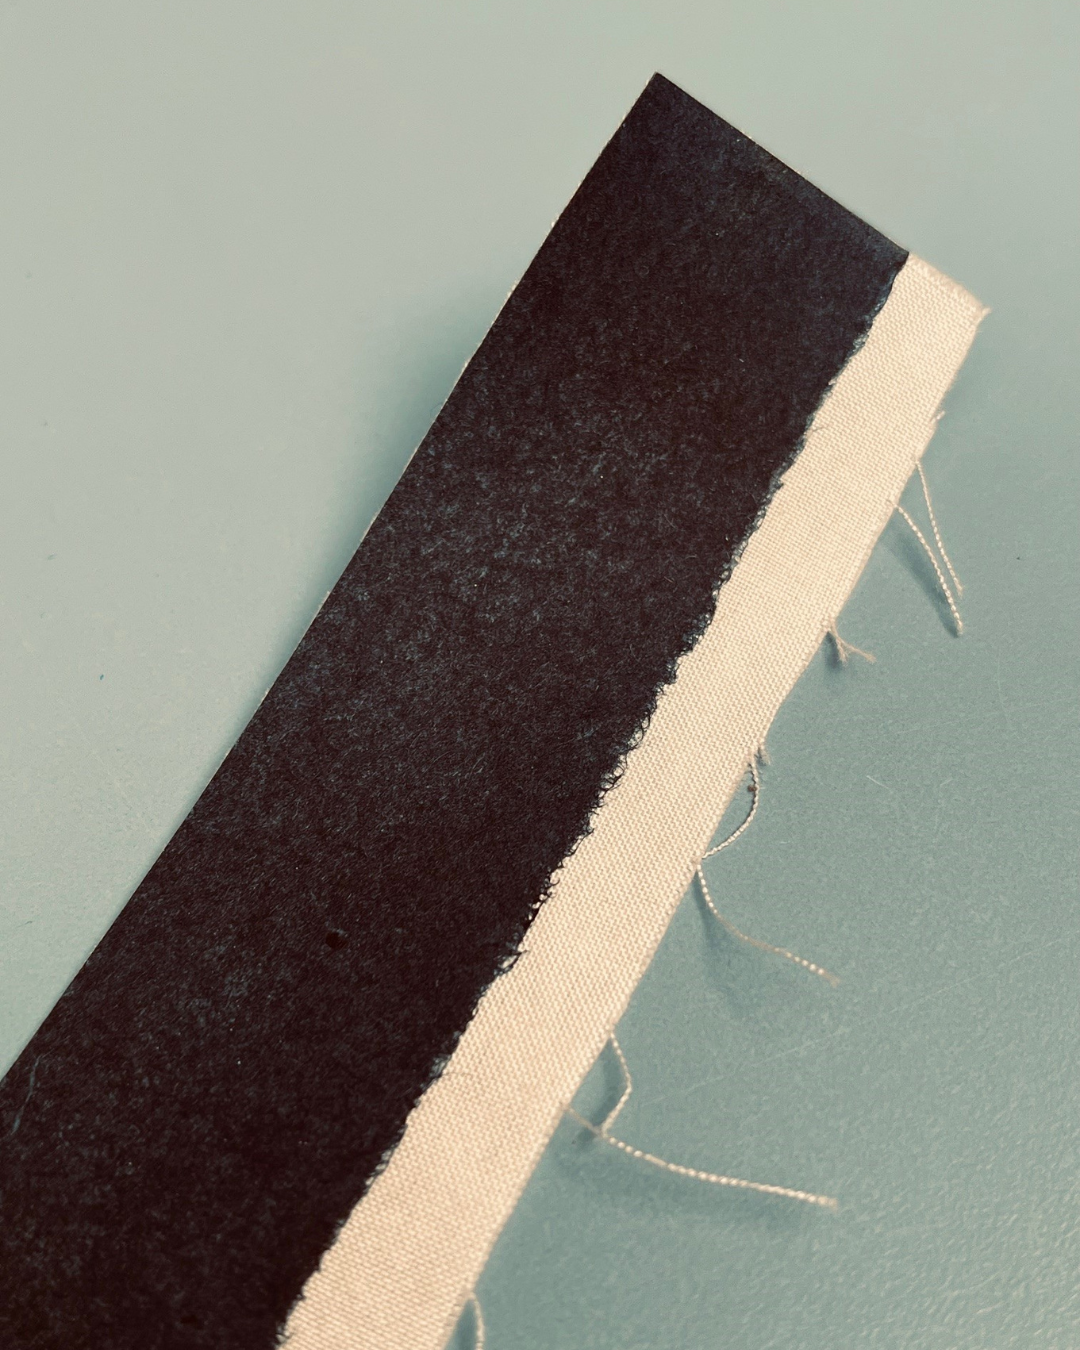
Traditionally, leather would have been used as a new spine lining. As this is expensive and difficult to prepare, a composite of Japanese paper on aerolinen is substituted. This affords an equally strong join for the boards but is easier to prepare. The Japanese paper was dyed with acrylic paint beforehand to match the existing leather spine.
The composite was first applied to front board by inserting under the lifted leather board covering. It was adhered using a mixture of wheat starch paste and EVA and allowed to dry.
Attachment of Second Board and Turn-ins
Before the composite is adhered to the hollow and the back board it was vital to ensure that both boards are perfectly aligned with each other and the book block. Once adhered in place and the joints ‘set’ it was allowed to dry. The next stage is the most difficult as this involved turning in of the excess material at the headcaps into the hollow and around the edges of the boards at the head and tails.


Removal of Old Spine Lining
Similarly to the treatment of the back of the book block, wheat starch paste was brushed onto the underside of the original leather spine to soften the linings which was gently scraped off whilst retaining the false headbands.
Relining of old spine and attachment
To consolidate the spine and allow for easier removal in the future, a layer of supportive Japanese paper was adhered to the underside of the leather spine using wheat starch paste. Once dried the spine could then be re-adhered onto the new spine cover. To help it stay in position as it dried a bandage was wrapped around the book with an intervening layer of ‘bondina’ to prevent the bandage from sticking to the spine.


Completion
Although conservation treatment techniques and materials remain mainly standardised, each object to be conserved does offer its own challenges and complexities, this album was no exception. Although still fragile the album can be issued to our researchers in our reading room using suitable supports – such as a book sofa.
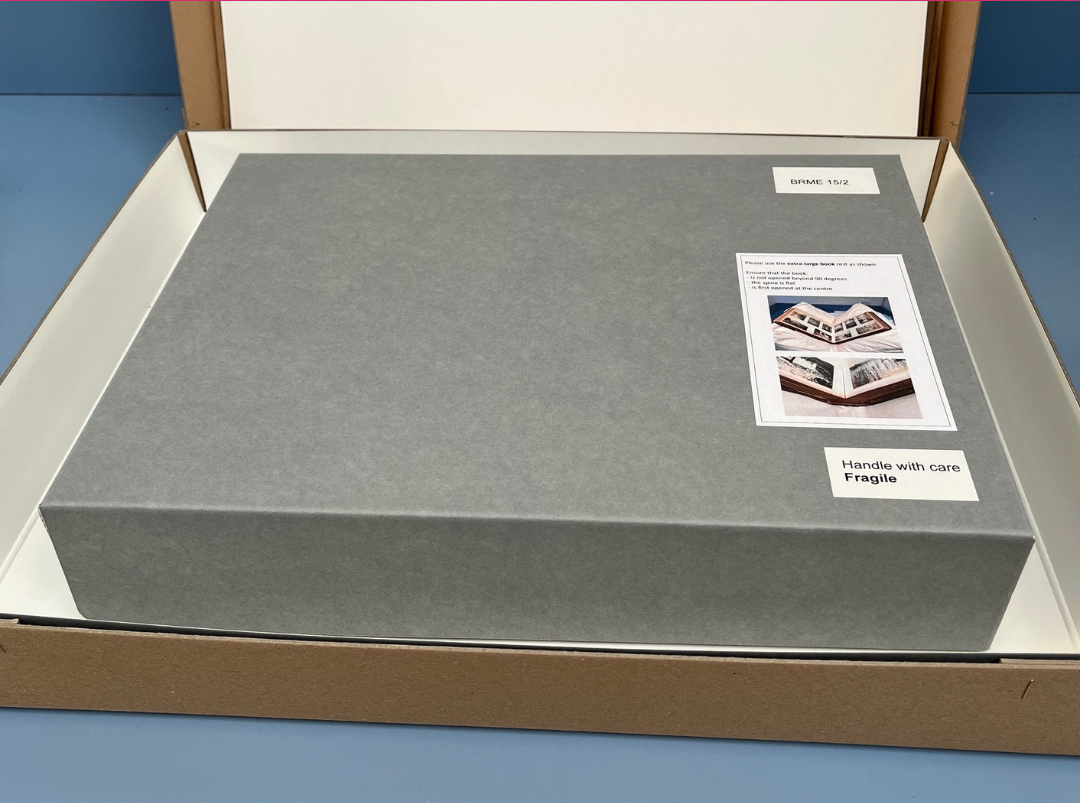
An extra level of protection is afforded by a bespoke clamshell box made from archival quality corrugated board. This is also ideal for clearly displaying information relating to handling.
David Parker
Paper Conservator, Churchill Archives Centre